

Why UL Listed Certification Matters: How to Spot Safe Electronics
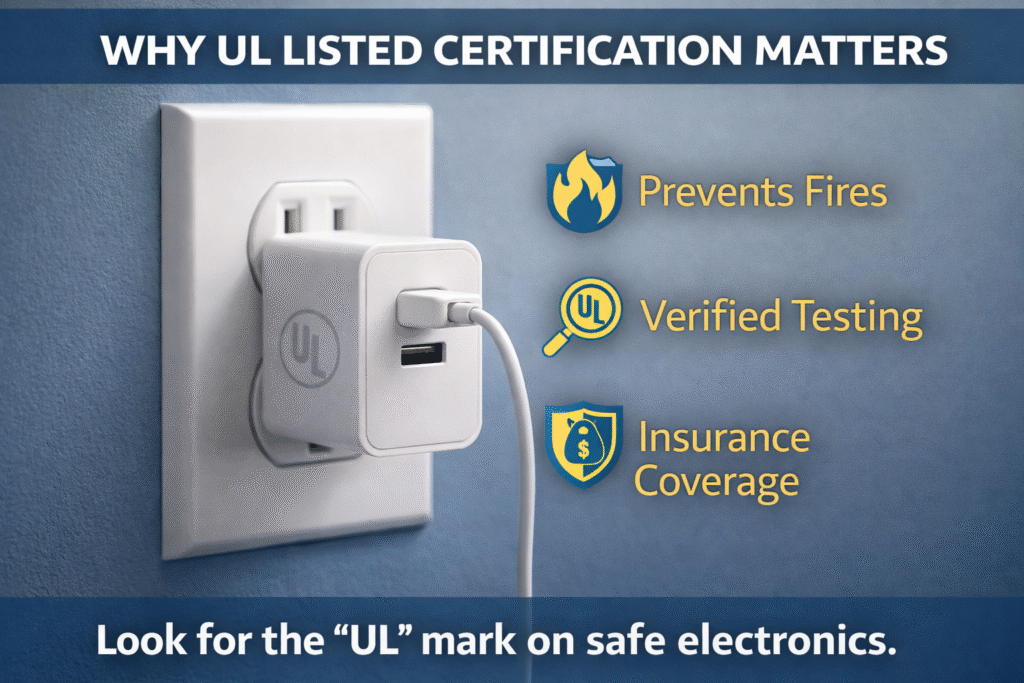
Look closely at your favorite phone charger for a tiny “UL” stamped inside a circle. That small mark is an invisible protector standing between your morning routine and a house fire. The letters stand for Underwriters Laboratories, an independent safety organization. The easiest way to validate a claim is to verify it directly. UL provides a public lookup tool called Product iQ: UL Product iQ. If you want to review our own compliance documentation and certificates, you can also visit our Certifications page. What Does UL Stand For? The Independent Referees Behind Your Toaster Underwriters Laboratories is a global leader in safety science, focused on testing products to determine what makes them safe or risky. Many consumers assume UL is a government agency, but it is an independent third party. That independence matters because it means a neutral lab verifies a manufacturer’s claims under controlled conditions. Inside the Torture Test: How Your Appliances Earn the Safety Seal Cheap discount electronics often skip verification. UL style certification tests evaluate the finished product, not only a single internal part. Typical evaluations include impact resistance, overheating scenarios, and surge conditions, plus ongoing factory compliance checks. Drop testing: verifies housing integrity after real-world falls. Thermal testing: checks overheating risk under heavy load. Surge testing: validates resilience to electrical spikes. UL Listed vs. UL Recognized: The Difference That Prevents House Fires A UL Recognized mark generally applies to components used inside finished products. A UL Listed mark typically applies to the final product tested as a complete unit. For consumers, “Listed” is usually the safer reference point for finished goods, because it reflects testing of the complete device rather than one part. The Hidden Risks of Unverified Electronics and Insurance Denials Unverified products can overheat and fail in ways that create fire risk. In addition, after an incident, insurers and investigators may assess whether the product met expected safety standards. Choosing certified products helps reduce both physical risk and downstream liability concerns. Your 5-Minute Home Safety Audit: How to Verify Your Devices Do a quick sweep of common high-draw items like chargers, heaters, and power strips. Then verify the mark and the manufacturer data in a trusted database. Check the plug: prongs should be solid, straight, and well-fixed. Inspect the logo: crisp printing, no misspellings, no blurry edges. Look for embossed marks: molded labels are harder to fake than stickers. Verify online: confirm the listing in UL Product iQ. Buying With Confidence: A New Standard for a Safer Home Use a simple rule: check for certification on high-load devices, avoid suspiciously cheap copies, and treat small price differences as insurance for your home. If you want more practical guides, you can browse our Blog. If you have questions about compliance or product requirements, you can also contact us.
Choosing the Right Electrical Box: Plastic vs Metal, Size, and Safe Installation
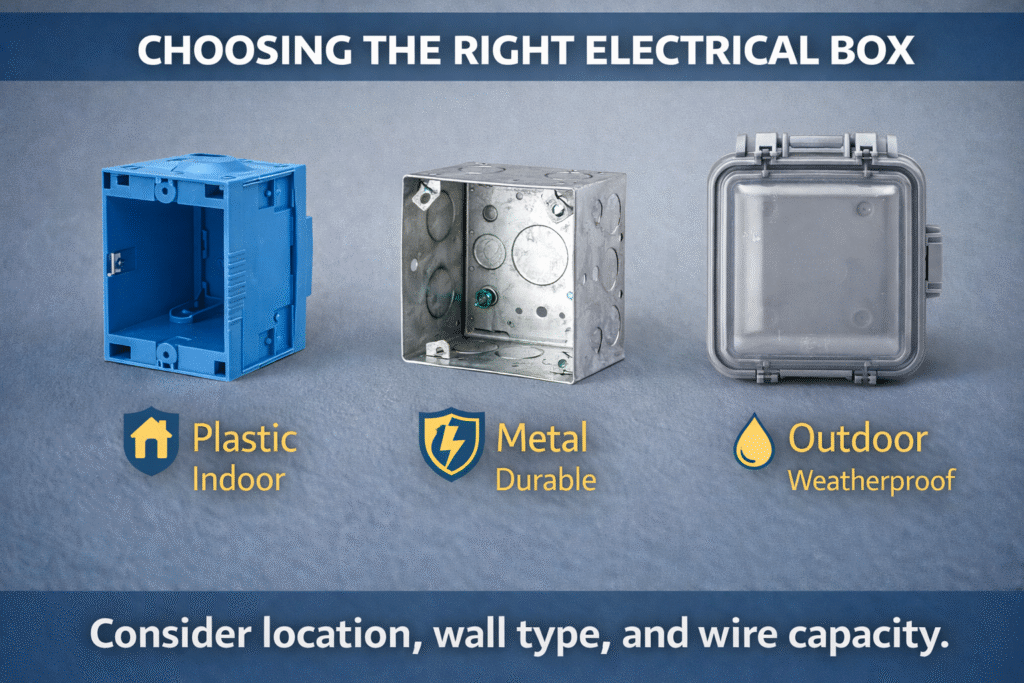
You’re standing in the hardware store aisle, staring at dozens of blue, grey, and metal boxes. While they all look like simple containers, picking the wrong one guarantees frustration when your new switch refuses to sit flush against the wall. According to the National Fire Protection Association, electrical installation safety is defined by clear standards, including enclosure requirements and protection practices. You can learn more about the National Electrical Code here: NFPA NEC. Ultimately, choosing the right electrical box comes down to three main factors: location, wall condition, and interior volume. If your project involves more robust protection needs, you can also review our Metal Enclosure options for tougher environments. Blue Plastic or Shiny Metal: Choosing the Right Shield for Your Wiring When weighing a plastic vs metal electrical box, your environment dictates the winner. For indoor jobs behind drywall, plastic is practical because it is non-conductive and budget-friendly. However, if wiring is exposed, such as a surface-mounted garage outlet, a metal box provides stronger impact protection. Because steel conducts electricity, metal boxes require an extra safety step. To reduce shock risk, bond the circuit ground wire to the box using the dedicated green grounding screw. Weight and cost: plastic is lighter and cheaper. Durability: metal handles impacts better, while plastic can crack. Grounding: metal requires bonding, plastic does not. Open Studs or Finished Drywall: Picking the Right Mounting Style With open framing, choose “new work” boxes designed for studs. They typically include nails or brackets that attach directly to the framing before drywall goes up. For finished walls, “old work” boxes use flip-out clamps that grip the drywall from behind. This avoids opening the wall to locate a stud and reduces repair work after installation. The Suitcase Rule: How to Calculate Box Size So Your Outlets Fit Think of the box like a suitcase. Overfilling it makes installation harder and increases risk. Check the box for a cubic inch volume stamp. That number helps you select enough internal capacity for wire count, device size, and safe wire folding space. 1-gang: one switch or outlet. 2-gang: two devices side by side. 3-gang: three controls in one wide box. If wall depth is limited, a shallow box may be necessary. In that case, keep wiring minimal and confirm box fill capacity to avoid overcrowding. From Ceiling Fans to Garden Outlets: When You Need a Specialty Rated Box Ceiling fans require fan-rated boxes with proper bracing. Outdoor outlets need weatherproof boxes and in-use covers. For sealed outdoor enclosure solutions, you can explore our Waterproof Junction Box options. Gaskets: seal between box and faceplate to block water. Covers: in-use covers keep cords protected while plugged in. Mounting: use proper mounting points to avoid leak paths. Three Mistakes That Make Boxes Fail: Grounding, Tightness, and Depth Boxes fail when grounding is skipped, devices are mounted too deep, or the box is not secured tightly. Use spacers when needed to bring outlets flush. Always bond metal boxes correctly, then verify stability before closing the wall. Your 3-Step Shopping List for a Professional-Grade Install Location: indoor standard or outdoor weatherproof. Wall type: new work for open studs or old work for finished drywall. Device count: choose the right gang size and enough box volume. Always confirm power is off at the breaker before working on wiring. If you want help selecting the right enclosure approach for a project, you can contact us.
Choosing the Right Storage Cabinet: Size, Materials, Weight Capacity, and Locks

We’ve all been there: staring at a pile of shoes or scattered craft supplies, wishing the mess would vanish. Buying a storage cabinet seems like the perfect magic trick. However, according to professional organizers, impulse purchasing based on looks alone usually leads to wasted space. In practice, choosing the right storage cabinet means treating it as a functional tool, not just a decorative box. If you want a quick overview of practical storage planning ideas, Family Handyman has useful guidance on storage solutions: Family Handyman. If you enjoy practical guides and checklists, you can also browse our Blog. If you want help choosing a durable option for heavy-duty storage needs, you can contact us. How to Measure for Storage Cabinets Without Making the “Swing Space” Mistake To avoid fit issues, apply the Footprint Rule. Measure from the thickest part of the baseboard, not the drywall. Then add Swing Space so doors can open without hitting furniture or blocking a hallway. If the room is tight, consider a tall cabinet to increase capacity without widening the footprint. Wood vs. Metal: Matching Your Cabinet Material to the Room’s Humidity Humidity should guide your material choice. Wood and MDF look great in living spaces, but garages and damp areas often require moisture-resistant solutions. A metal cabinet can handle humidity swings better, especially if it uses a powder-coated finish to resist scratches and rust. Preventing Shelf Sag: Why Weight Capacity and Steel Gauge Matter Construction quality matters for heavy loads. A lower steel gauge usually means thicker metal. Welded frames are also more rigid than flat-pack options. Always leave a safety buffer for dynamic loads caused by dragging and shifting boxes. Static weight: items sitting still on a shelf. Dynamic weight: stress added when items are moved or dropped. Security and Style: The Benefits of Lockable Metal Cabinets and Modular Systems Lockable cabinets help secure household chemicals and important documents. Modular systems also scale with your needs, letting you add drawers or extra cabinets later. Details like leveling feet and magnetic catches improve daily usability, especially on uneven floors. Your Final Buyer’s Checklist: 5 Steps to the Perfect Storage Solution Space: confirm footprint and door swing clearance. Environment: choose materials for the room’s humidity. Weight: verify shelf load limits and frame rigidity. Features: prioritize adjustability and quality hinges. Budget: balance upfront cost with long-term durability. Ultimately, choosing the right storage cabinet is an investment in daily peace of mind. Measure first, match materials to your room, and verify load capacity before buying.
Choosing the Right Outdoor Electrical Box: Weatherproof Ratings, Materials, and Safe Setup
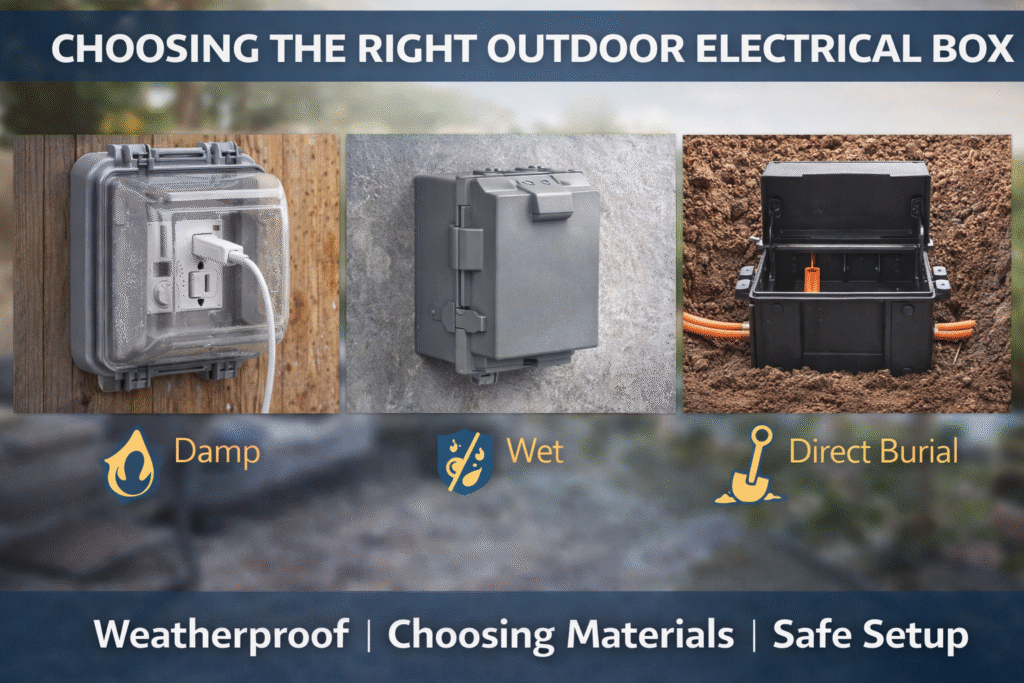
You’ve finally hung those patio string lights, but every light drizzle triggers the frustrating mystery trip where your breaker flips. In practice, moisture creeping into an unprotected outlet can create short circuits and unsafe conditions. A true weatherproof electrical box relies on thick rubber gaskets and proper sealing. Standard indoor boxes are not designed for outdoor exposure. If you want a sealed solution designed for exterior projects, explore our Waterproof Junction Box options. Damp Porch or Rain-Drenched Wall: Selecting the Box for Your Exposure Safety starts by matching your location to the correct exposure type. Damp areas are protected from direct rain, while wet areas face direct rainfall and spray. Direct burial is a separate category for underground runs. Damp: covered porch areas where humidity exists but rain does not hit directly. Wet: exposed exterior walls, fences, and open-sky locations. Direct burial: underground trenches running power to outdoor features. For rating references, NEMA enclosure type guidance explains protection levels and use cases: NEMA enclosure types. In most residential rain applications, NEMA 3R is often sufficient, while 4X is typically chosen for harsher corrosion or industrial environments. Plastic vs. Metal: Choosing an Enclosure That Won’t Rust or Crack For many outdoor installs, UV-stable plastic is a simple DIY choice. It does not conduct electricity and it resists corrosion. Metal boxes can be better for impact resistance, but they require correct grounding and a corrosion-resistant finish. If your project needs a tougher enclosure approach beyond a basic outlet box, you can also review our Metal Enclosure range. The “Crowded Room” Rule: Sizing Your Box and Understanding “Gangs” Outdoor wiring needs space for safe folding and heat control. Gang size defines how many devices fit side by side. Depth also matters because GFCI outlets are bulkier than standard receptacles. Single outlet: standard 1-gang box. Switch and plug combos: 2-gang box. Thick wires or GFCIs: choose a deeper box to avoid crushing connections. The “In-Use” Shield: Protecting Plugs While They Operate Standard flap covers do not protect cords while plugged in. For wet locations, use an in-use cover that closes around the cord and keeps rain out during operation. Self-closing hinges: close automatically when cords are removed. Padlock loops: reduce tampering risk. Bubble depth: fits bulky plugs while keeping the lid shut. Watertight Seals and Gaskets: Preventing the Mystery Trip For surface mount installs, seal unused knockouts and use proper fittings for conduit entry. Apply silicone along the top and sides to block water intrusion. Leave the bottom edge unsealed so condensation can drain as a weep path. Your Safe Outdoor Power Action Plan Reliable results come from matching the rating to the location, choosing the right material, sizing the box correctly, and using an in-use cover with proper sealing. If you want help choosing the best enclosure for your project, you can contact us with your use case and environment details.
Electrical Panels Explained: Breakers, Loads, and When to Upgrade Safely
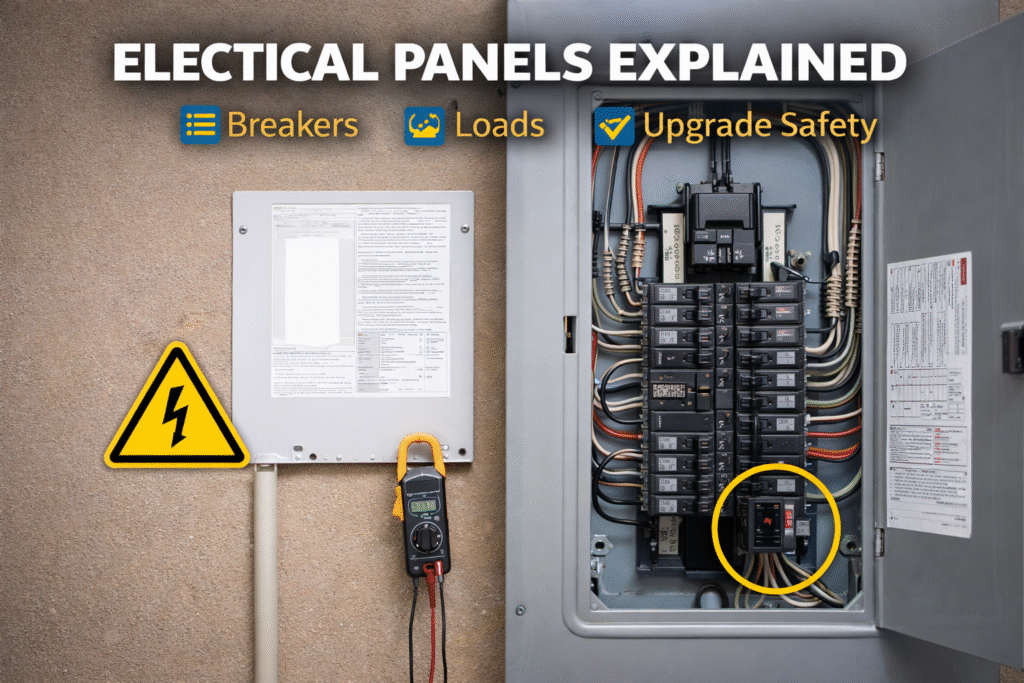
We’ve all been there: you plug in the vacuum while the space heater is running, and suddenly darkness. That frustrating click from your home electrical box isn’t a failure. It is a complete success. It just prevented an overloaded wire from catching fire. According to residential electricians, electrical panels act as the brain of your house. They take massive street power and sort it into safer circuits. This system protects appliances and reduces overheating risks. For broader safety guidance, you can also refer to the National Fire Protection Association overview of the National Electrical Code: NFPA NEC. Demystifying these metal circuit boxes saves money and eliminates unnecessary panic. This hidden hub helps you distinguish routine maintenance from warning signs that justify a professional inspection. If you need industrial grade enclosures for outdoor or workshop installs, explore our Metal Enclosure range. Inside the Metal Box: Identifying the Main Breaker and Branch Circuits Opening your main breaker box reveals the central hub of your home’s electricity. At the top sits the Main Breaker, acting as the ultimate kill switch for emergencies. Some setups use a Main Lug design, which does not include a single master shutoff. Inside a circuit breaker panel board, power divides into smaller branch circuits. Every electrical panel load center relies on these core parts: Main Breaker: The primary shut off valve. Branch Breakers: Switches controlling individual rooms. Bus Bars: Metal strips distributing power. Neutral Bar: The return path completing the loop. Examine the switches inside your electrical panel with breakers. The numbers stamped on them indicate amperage, which is the maximum capacity for each circuit. Pulling too much power at once triggers built in protection. Amps, Volts, and Security Guards: How Your Panel Decides When to Shut Down Picture electricity flowing like water in a continuous loop from your power panel box to an outlet and back. Volts provide pressure, while amps reflect capacity. Bedrooms often use 15 amp circuits, while kitchens commonly require 20 amp circuits for heavier loads. Running a space heater and a vacuum simultaneously can exceed a circuit’s safe capacity. In breaker panels, each breaker behaves like a security guard. During an overload, it trips to prevent overheating wires and reduce fire risk. That shutoff can also happen if electricity escapes its loop, which creates a short circuit. If trips happen often, your current electrical panel setup may no longer match your usage. From Fuses to 200 Amps: When is Your Panel No Longer Enough? Older homes sometimes rely on round glass fuses instead of modern breakers. In the fuse box vs circuit breaker comparison, fuses are one time parts that melt during overload. Breakers can be reset after the issue is fixed. Even with breakers, an older 100 amp service can be too small for today’s appliances. Adding EV charging or central air often requires upgrading to 200 amp service. If you are planning new electrical loads, a qualified electrician can confirm capacity and safety. Age is not the only reason to consider replacement. Professionals often warn against outdated or unsafe equipment. If your setup shows heat damage, corrosion, or repeated trips, it is time to schedule an inspection. The 3-Step Safety Reset: What to Do When the Lights Go Out When the power drops, your first instinct is heading to the breaker box. Finding the culprit can be tricky because tripped breakers may sit between on and off. Here is how to reset a tripped breaker safely: Unplug appliances: Remove devices that overloaded the circuit. Flip to OFF: Push the breaker fully off until you feel a click. Flip to ON: Switch it back on to restore power. Stand slightly to the side when resetting. If the breaker trips again immediately, stop. Repeated trips can indicate a fault that requires professional troubleshooting. Silent Alarms: Why Your Panel is Buzzing or Smelling Like Burnt Plastic Wondering why your breaker box is buzzing. A faint hum can be normal. However, popping, sizzling, or crackling can indicate electrical arcing, which is a serious hazard caused by loose connections. Treat these as urgent warning signs: Buzzing: Loud popping or sizzling sounds. Heat: A panel cover that feels warm. Smells: Burnt plastic or a sharp ozone like odor. Flickering lights: House wide dimming when appliances run. Never tape a breaker in the on position. These symptoms can point to damaged bus bars or failing connections. If you suspect damage, shut off power and call an electrician. Your Electrical Safety Roadmap: Moving from Confusion to Control Your electrical panels do not need to be a mystery. Check whether your circuits are labeled. If not, labeling your breakers is a practical weekend project that improves safety and reduces stress during outages. Once circuits are mapped, consider surge protection and periodic inspections. If you need a protective enclosure for an electrical cabinet or control setup, review our Electric Cabinet solutions. If you want help selecting the right enclosure and configuration, you can also contact us. When a breaker trips, remember it did its job. It protected your wiring by shutting down before overheating could escalate. With a clearer understanding, you can manage small issues safely and recognize when professional upgrades are the right call.
Fibreglass Electrical Enclosures: The Weatherproof, Shock-Proof Choice for Outdoor Wiring
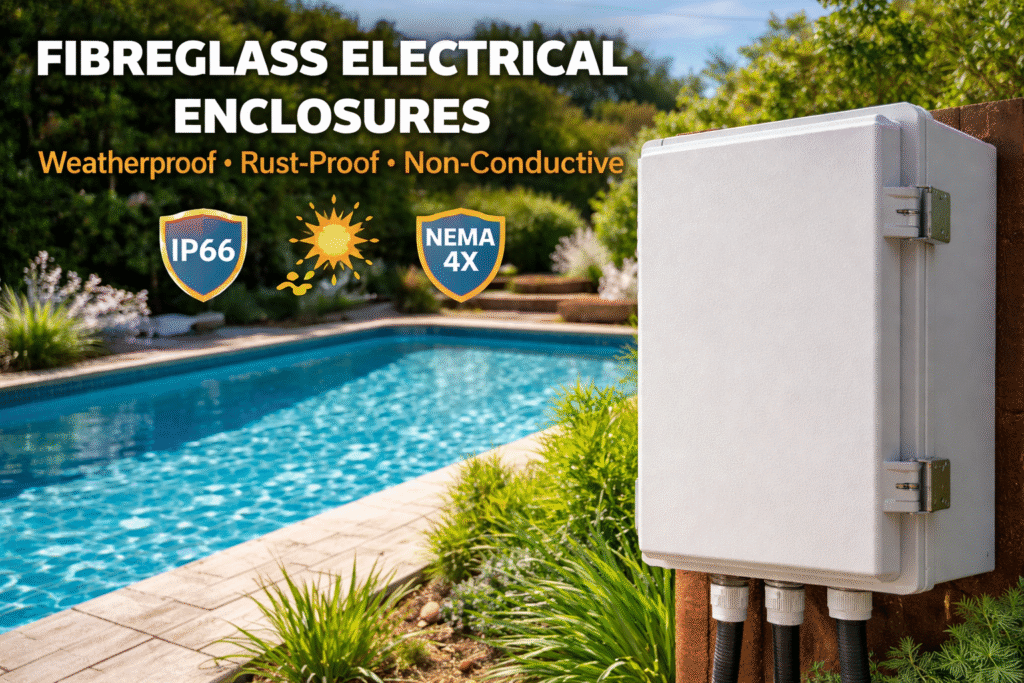
You pass them every day near swimming pools and garden walkways. Those sturdy, neutral-colored units are fibreglass electrical enclosures, high-tech shields designed to keep outdoor wiring protected. These enclosures use Glass Reinforced Plastic (GRP), a reinforced composite often compared to the strength of a boat hull. For reference on protection levels used for outdoor enclosures, you can review the official IP code overview based on IEC ingress protection guidance. In practice, this creates the perfect “Goldilocks” material because a fiberglass enclosure box won’t rust like metal or snap like standard plastic. Crucially, this fiberglass housing is non-conductive, so it cannot energize the outer shell if a live wire touches the inside wall. If you are comparing materials across enclosure types, you can also explore our Metal Enclosure range for industrial use cases. GRP vs. Metal: Why Reinforced Composites Outperform Traditional Materials If you’ve dealt with rusted metal or brittle plastic yard covers, you know weather is brutal on outdoor equipment. Enter Fiber Reinforced Plastic (FRP), a composite that keeps its shape under pressure without bending or warping over time. That stability is one reason fibreglass is often selected for outdoor installations where sealing and long-term durability matter. Choosing FRP over polycarbonate or metal comes down to three practical factors: Fiberglass electrical boxes: lightweight, completely rust-proof, and highly impact-resistant. GRP vs stainless steel cabinets: steel is strong but heavy and may degrade in aggressive environments over time. Standard polycarbonate: light and rust-proof, but it can crack from hard impacts. Unlike basic plastics that turn brittle during freezing winters, or steel that corrodes in damp soil, fibreglass remains stable year-round. This durability makes it a true maintenance-free solution. For installations that also require high sealing performance, you may want to compare with our Waterproof Junction Box solutions. The Shock-Proof Advantage: Keeping Your Family Safe Around Outdoor Wiring Picture the thick rubber coating on a household power cord. A fiberglass junction box works in a similar way, acting like a protective barrier around outdoor wiring. If a live wire touches the inside of a metal enclosure, the exterior can become a shock hazard. Thanks to the dielectric strength of composite housing, fibreglass prevents the enclosure body from becoming energized, which also simplifies installation in many outdoor setups. From Salty Air to Scorching Sun: How Fibreglass Defies the Elements Standard plastics often fail in constant sunlight, but fibreglass is designed for long-term outdoor exposure. UV stable outdoor electrical boxes resist fading and cracking under intense solar rays. In addition, the composite acts like an insulated shell, helping maintain steadier internal temperatures and extending the life of components such as timers, switches, and pool equipment. When choosing an enclosure, check two common protection labels: IP66: dust-tight protection and resistance to strong water jets. NEMA 4X: water-tight performance and strong corrosion resistance, useful for coastal air. Working with Fibreglass: Simple Tips for Your First Installation Securing your enclosure requires a slightly different approach than standard boxes. Avoid drilling straight through the back where possible, and use external mounting kits to preserve the sealed compartment. For cable entry, use a proper cable gland so the rubber gasket grips the cable jacket and prevents water ingress. The “Set It and Forget It” Investment: Choosing the Right Box for Life If your environment includes moisture, salt, chemicals, or direct sun, upgrading to fibreglass is often the most durable long-term choice. When you are ready to source the right configuration, you can contact our team with your size, quantity, and target rating, and we will recommend the best enclosure solution for your project.
IP67 Rating Meaning: What Ingress Protection Really Guarantees

You’re washing dishes when your phone suddenly slides into a full sink. That split-second panic is universal, yet the difference between a ruined device and a quick towel-off relies on the IP67 rating. While marketing terms often exaggerate, this standardized code offers a precise promise of survival. Many shoppers assume these numbers represent a single score, but the meaning of ingress protection actually involves two separate grades for dust and water. The first digit creates a barrier against dirt, while the second defends against liquid intrusion. So, what does IP rating mean for you? In practice, it confirms your electronics can survive accidental drops up to one meter deep. This rating ensures peace of mind for life’s messy moments without promising your phone is a submarine. Decoding the Digits: Why Ingress Protection Is Not a Single Score When you see “IP67” on a spec sheet, it is easy to mistake it for a single score out of 100, like a grade on a math test. In reality, that code stands for “Ingress Protection,” and it is actually two separate grades sitting side-by-side. The first digit rates how well the device blocks solid objects, while the second measures its defense against liquids. This distinction is vital because a gadget could technically be great at repelling water but terrible at blocking sand. Manufacturers cannot simply invent these numbers to boost sales. To claim a specific IP rating, they must follow a global rulebook known as the IEC 60529 standard. This acts as a universal testing guide, ensuring that every device is subjected to the same controlled laboratory conditions. It guarantees that the badge on the box is based on rigorous evidence rather than marketing hype. Learning how to read ingress protection codes gives you a clearer picture of what your electronics can actually handle. You are no longer guessing about durability; you are looking at a precise report card. The full story begins with the first half of the code: the defense against solids. Beyond the Surface: How a ‘6’ Keeps Dust and Grit Out of Your Charging Port Ideally, you want to take your gear everywhere, but the real world is full of grit. The “6” in IP67 represents the highest score on the ingress protection scale chart, certifying that the unit is officially “dust-tight.” Unlike lower ratings that might allow some dust entry as long as the device keeps working, a level 6 seal locks out everything. This is crucial for protecting electronics from particle ingress that commonly clogs charging ports or triggers internal overheating. Without this barrier, microscopic specks can infiltrate delicate hardware and cause long-term failure. A dust-tight electronic enclosure is essential for: Sandy beaches where grains can jam buttons. Hiking trails filled with fine dirt. Woodshops or DIY zones with flying sawdust. With the solids completely blocked, the only remaining question is how the device handles a sudden plunge into water. The 30-Minute Rule: What Submersion at 1 Meter Actually Looks Like While dust protection is essential for long-term durability, water is the immediate threat that worries most owners. The second digit in the code addresses this fear, indicating that your device is capable of withstanding temporary immersion in water depth. This rating goes beyond simple splash resistance, offering a robust shield against those heart-stopping moments when gravity wins and your electronics take a plunge. To earn this specific grade, a device must survive being submersible up to 1 meter (roughly 3.3 feet) for a duration of 30 minutes. If you accidentally drop your phone in the sink or the shallow end of a pool, the seals are designed to hold tight within that specific window of time and depth. This half-hour buffer provides the critical opportunity you need to retrieve and dry off your gear before permanent damage occurs. Crucially, this standard tests static pressure in a lab, meaning it does not account for the force of moving water like ocean waves or a high-pressure faucet. The IP67 waterproof rating is perfect for accidental drops, but it isn’t a license to go swimming. Since different environments pose different risks, you need to know if this level of protection is enough for your specific needs or if you require an upgrade. IP67 vs. IP68 vs. IP54: Which Rating Should You Buy? Deciding how much protection you actually need can save you money, as higher ratings often come with steeper price tags. While IP67 is the “sweet spot” for most users, you will frequently see other numbers like an IP44 rating or IP54 on headphones and fitness trackers. These lower scores mean the device can handle sweat or a light drizzle, but a fall into a puddle would likely be fatal. Matching the right level of durability to your lifestyle is simple: IP54: Best for workouts and rain. What is IP54 water resistant? It means the device is splash-proof, but strictly not waterproof. IP67: Best for general peace of mind. It handles accidental drops in sinks, toilets, or shallow pools. IP68: Best for adventurers. When comparing IP67 vs IP68 for smartphones, the “8” indicates it can stay submerged deeper and longer than the standard half-hour. Selecting the right category from the IP rating chart ensures your gear survives your daily routine without breaking the bank. However, be aware that even the highest laboratory scores can crumble when faced with two specific enemies found in the real world. The ‘Kryptonite’ of Electronics: Why Saltwater and Steam Bypass Your Seals Fresh water is the only liquid used in certification labs, which often creates a false sense of security for beachgoers. The ocean contains salt that actively corrodes and dries out the rubber gaskets designed to keep moisture out. Once this chemical degradation begins, the impact of salt water on seals can essentially turn a protected device into a brick, so it is much safer to leave your electronics in your beach bag. Heat poses an even sneakier threat than liquid water. Can you shower with an IP67 watch? The
Metal Electrical Box Guide: Why Steel Boxes Matter for Safety and Code Compliance
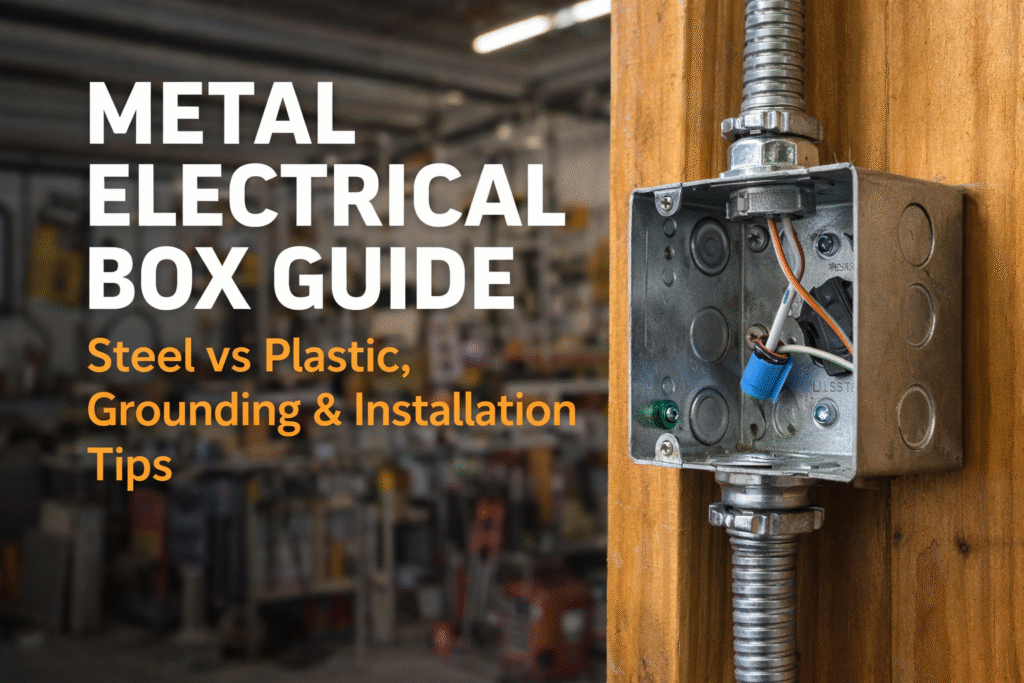
If you look behind a switch in an unfinished garage, you’ll often see a sturdy silver container instead of white plastic. This switch box metal unit acts as a critical protective shell for your wiring. Crafted from galvanized steel, these boxes resist fire and impact significantly better than PVC. Consequently, building codes often require galvanized steel electrical box installation wherever wires face physical risks or exposure. These enclosures also provide unique functionality beyond simple durability. You will see small circular tabs called “knockouts” that are punched out to create cable entry points. Crucially, every metal electrical outlet box features a dedicated “grounding point.” This threaded hole connects the steel body to safety wires, ensuring that if stray current touches the box, it is safely diverted away from you. Steel vs. Plastic: Why Exposure and Durability Determine Your Box Choice Most homeowners default to blue plastic boxes because they are cheap and easy to nail into a wooden stud behind drywall. However, plastic fails when the wiring is exposed in an unfinished basement or workshop. In these spaces, the box must survive accidental bumps from tools, lumber, or lawn equipment. Steel electrical boxes provide this necessary “mechanical impact protection,” acting as sturdy armor for the fragile connections inside. Beyond physical strength, metal offers superior containment if a wire connection sparks or overheats. While plastic can eventually melt under extreme heat, a metal box acts as a fire-resistant electrical enclosure. This capability prevents an internal electrical fault from igniting nearby dust or wood, making steel the safer choice for utility areas. When to use metallic vs plastic electrical boxes depends on the location: Garage or Workshop: Use Metal to protect exposed wires from physical damage. Finished Bedroom: Use Plastic inside the walls for cost savings and easier installation. Masonry Wall: Use Metal since plastic cannot securely anchor to concrete or brick. Once you determine that steel is required, the challenge shifts to selecting the right configuration, such as “handy boxes” or “gangable units.” Navigating the Aisle: Deciphering Handy Boxes, Gangable Units, and Square Enclosures At the store, the most obvious difference is between the rounded corners of a “handy box” and the sharp edges of a standard square enclosure. The handy box is designed specifically for handy box vs square box applications, such as surface mounting on concrete garage walls where wiring cannot be hidden. Conversely, square metal boxes provide more internal volume for complex wiring and are typically used with a “mud ring”—a raised cover that bridges the gap between the deep box and your finished drywall. Electrical sizing relies on the term “gang,” which refers to the number of switches or outlets a box can hold. A metal light switch box built for one toggle is a “single-gang,” while a “double-gang” holds two side-by-side. For unique projects, look for a gangable metal box. These units feature removable side plates that allow you to unscrew and merge multiple single boxes together, creating a custom enclosure for as many switches as you need. | Box Type | Typical Dimensions (H x W) | Best Application | | :— | :— | :— | | Single-Gang | 4″ x 2 1/8″ | One switch or outlet | | Double-Gang | 4″ x 4″ | Two devices side-by-side | | 4-Inch Square | 4″ x 4″ | Heavy wiring volume; requires a mud ring cover | Selecting the correct physical size ensures your switches fit, but the metal construction serves a deeper purpose than just holding devices. Unlike plastic, these conductive boxes are an active part of your home’s electrical defense system. The Grounding Safety Net: How Metal Boxes Protect You from Electrical Shocks While plastic boxes are naturally insulated, a metal junction box introduces a unique scenario where the material itself conducts electricity. If a loose “hot” wire accidentally brushes against the interior walls, the entire enclosure becomes energized and dangerous to touch. To prevent this shock hazard, the metal must be connected to your home’s ground system, effectively turning the box into a safety net that captures stray electricity and trips the breaker immediately. Creating this protective path requires “bonding.” You will typically find a threaded hole in the back of the box designed specifically to accept a green grounding screw. By wrapping a short length of bare copper wire—often called a “pigtail”—around this screw and connecting it to your circuit’s main ground wire, you succeed in grounding a steel outlet box safely. This ensures the metal frame creates a continuous path back to the electrical panel. Modern building standards, specifically the National Electrical Code grounding requirements, mandate this step because relying solely on the switch’s metal mounting strap is often unreliable. Once the bonding is secure, the box is electrically neutral and safe to handle. From Drywall to Masonry: Mastering Mounting Brackets and Surface Conduit Installing into open walls involves securing the enclosure to the wooden framing before drywall goes up. To mount metallic boxes to wood studs, look for units with pre-attached side brackets or nailing flanges. Position the box so its front edge extends slightly past the stud, matching the thickness of your future wall covering. This ensures the final switch plate sits flush rather than sinking into the plaster. Hard surfaces like concrete in basements or garages require a different approach. You will utilize surface mount conduit boxes for masonry, anchoring them directly to the brick using concrete screws. Because the wiring remains exposed, it travels through protective metal tubes called conduit that connect to the box via pre-punched holes, available in standard electrical conduit knockout sizes like ½-inch or ¾-inch. Opening these entry points for rigid pipe or for using romex in steel electrical boxes with a cable clamp requires a delicate touch. Follow this “twist-and-pull” method for a clean result: Place a screwdriver tip against the knockout slot furthest from the box rim. Strike the handle firmly to tip the metal disk inward. Grip the tipped disk with pliers and twist back and forth until
Underground Junction Box Guide: Waterproof Wiring That Survives Wet Soil
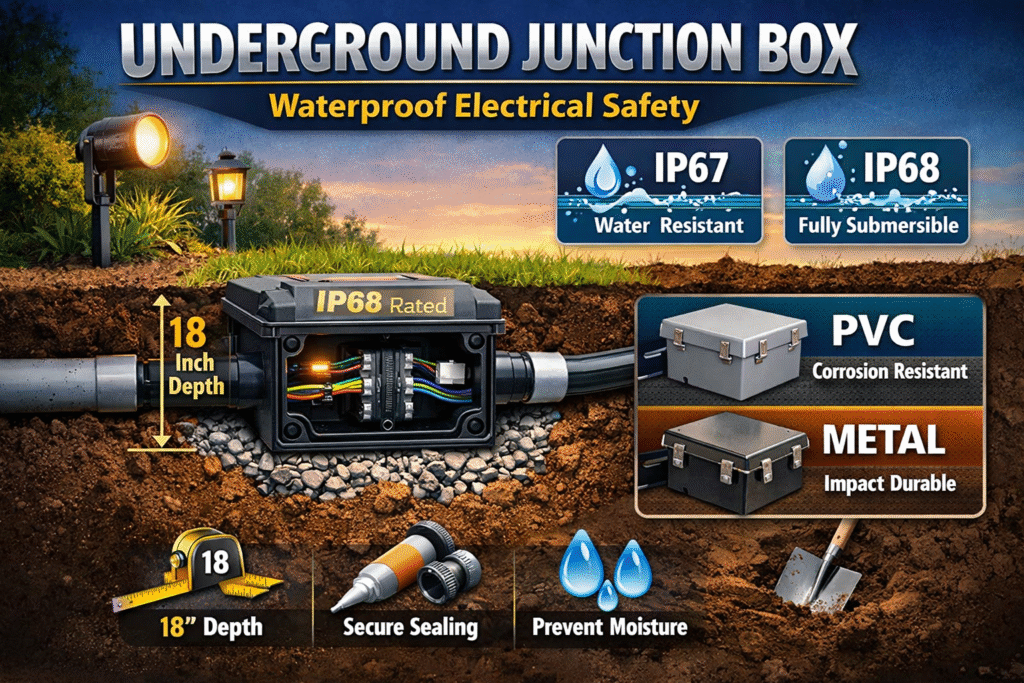
Most homeowners wouldn’t dream of burying a power strip in the garden, yet many landscape lighting projects fail because underground connections lack similar protection. An underground junction box acts as a “safe room” for your wiring, mirroring the function of the boxes behind your indoor outlets but built to withstand wet soil. Without this specialized electrical wire junction box, moisture quickly ruins standard connections, often leading to the “Flickering Light Mystery” where new lights fail unexpectedly. The real culprit is often a process industry experts call “wicking.” Much like a straw draws up liquid, exposed wire insulation can pull ground moisture deep into the copper core, destroying the cable from the inside out. Using a soil-rated outdoor waterproof wire splice enclosure prevents this invisible damage. Furthermore, it preserves a critical access point, ensuring you can service the system later without excavating your entire lawn. Is Your Box a Scuba Diver or a Swimmer? Most people assume that keeping water out of an electrical box is just about stopping rain, but burying a connection changes the physics entirely. Soil holds moisture like a heavy, wet sponge, creating constant pressure against the box walls—similar to how your ears pop at the bottom of a deep swimming pool. This force, known as hydrostatic pressure, will eventually push water through the tiniest hairline crack of a standard outdoor outlet box, corroding your wires within months. To ensure your system survives the wet season, you need to check the “Ingress Protection” (IP) code stamped on the enclosure. Think of these numbers as a survival score for your equipment: IP65: Resistant to water jets (rain), but not safe for burial. IP67: Can handle temporary submersion, like a puddle that drains away after a storm. IP68: The gold standard for underground use; designed to remain sealed while completely submerged under pressure. Real protection relies on a mechanical seal rather than just tight plastic. You want an electrical junction box with terminals that uses a rubberized gasket and screws to clamp the lid down, rather than a simple snap-on cover. Investing in IP68 rated weatherproofing for garden lighting or a complete submersible electrical connection kit might cost a few dollars more now, but it guarantees that groundwater stays in the dirt where it belongs. Choosing Your Armor: PVC vs. Metal Enclosures Just as you wouldn’t wear a wool coat to the beach, your choice of enclosure material depends entirely on the environment. A metal electrical junction box acts as a heavy-duty shield against accidental shovel strikes, but it has a natural enemy: acidic soil. If your ground is chemically aggressive or constantly wet, rust will eventually eat through steel, compromising the seal. In the PVC vs metal subsurface enclosures debate, non-metallic PVC is often the winner for residential projects because it is immune to corrosion and handles freezing ground temperatures without cracking. Material choice also dictates your safety wiring. Plastic acts as a natural insulator, but a metal conduit box can become a conductive hazard if a hot wire slips loose inside. To prevent the box itself from becoming “live” and shocking you, you must attach a grounding wire directly to the metal frame. While non-metallic conduit system integration creates a simpler install by skipping this extra bonding step, metal boxes provide a robust electrical path that guarantees your breaker trips instantly during a fault. Cost: PVC is budget-friendly; Metal commands a premium for durability. Corrosion Resistance: PVC is immune to rot; Metal degrades in acidic soil. Impact Strength: Metal resists crushing; PVC is best for undisturbed soil. Grounding: PVC is non-conductive; Metal requires a dedicated safety bond. Once you have selected your material, you need to determine the correct burial depth to ensure the safety of both the equipment and the landscape. The 18-Inch Rule: Protecting Your Connections from Shovels and Frost Safety isn’t just about the material of your enclosure; it is about how far down you place it to prevent accidental contact. If you bury a line too shallow, a simple weekend gardening project could turn dangerous if a spade slices through a live wire. The National Electrical Code burial requirements generally dictate an 18-inch cover for standard residential PVC conduit, though rigid metal pipes can sometimes sit as shallow as 6 inches because they resist impact better. While local rules vary, adhering to the 18-inch standard is the safest bet for most DIY projects, keeping your underground electrical box well below the “damage zone” of rototillers and lawn aerators. Water management is just as critical as depth, as even waterproof boxes can fail if submerged in a permanent mud puddle. When excavating, dig about six inches deeper than the required depth and fill that extra space with crushed gravel before setting the enclosure. This simple porous layer allows rainwater to drain away from the unit rather than pooling around the seals. Managing groundwater in external power hubs through a proper stone bed prevents the box from heaving upward or “floating” during freeze-thaw cycles, ensuring your connections stay stable year-round. Calculating what depth to bury electrical boxes requires measuring from the top of the conduit to the surface grade, not from the bottom of the trench. If you only dig an 18-inch trench and insert a 2-inch pipe, you are technically shallow and failing code. Once you have established the correct elevation and drainage base, the physical structure is secure, but the wires inside remain vulnerable to the one element that ruins more electronics than anything else: moisture intrusion. This leads us to the final layer of defense: specialized sealing. How to Create a Submersible Seal That Lasts Decades Water eventually bypasses standard rubber gaskets, especially during heavy rains or snowmelt. To create a truly permanent outdoor waterproof wire splice, professional electricians often rely on encapsulation rather than just tightening screws. While mechanical seals work well for damp locations above ground, resin-filled cable jointing kits are the gold standard for burial applications. These kits contain a two-part liquid that you pour over your connections;
Choosing the Right Outdoor Storage Solutions
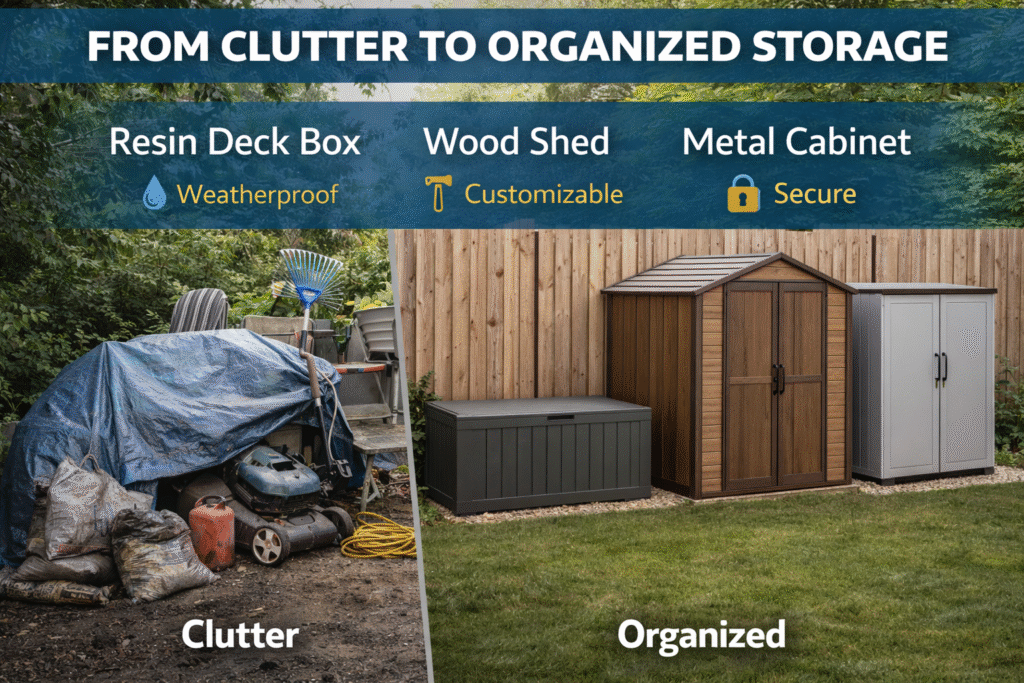
There is a distinct frustration in digging a rusted lawnmower out from under a soggy tarp because your garage lacks floor space. According to common landscaping knowledge, basic backyard items face rapid depreciation from constant exposure to seasonal moisture and intense UV rays. Your power tools represent a significant financial investment, yet leaving them unprotected guarantees premature mechanical failure. Combating this slow drain on your wallet means rethinking how you protect outdoor gear. In practice, disorganized yards suffer from the “Lego effect”—a chaotic jumble where expensive equipment is constantly lost or ruined by the elements. Finding the right outdoor storage solutions involves a practical framework for selecting durable materials and ideal sizes to maximize your patio storage ROI. Will It Fit? Converting Your Pile of Tools into Square Footage Buying an outdoor storage box only to realize the thick walls eat up inches of usable room is a common and costly pitfall. Manufacturers usually advertise exterior dimensions—the footprint taking up your yard—rather than usable interior capacity. To know what will actually fit, use the “stacking” method: gather your items, pack them closely together like a walk-in closet, and measure the resulting block’s total volume. Translating everyday yard gear into cubic footage makes sizing a small outdoor storage cabinet simple. Consider the required average sizes for these common items: Standard push mower: 15 cubic feet 4 stacked patio chairs: 25 cubic feet Average gas grill: 30 cubic feet 3 bags of mulch: 4 cubic feet Always finalize your math by applying the “20% Buffer Rule.” This spatial buffer zone ensures you can actually reach your tools without emptying the entire unit. If your footprint grows too large, vertical outdoor storage provides an excellent alternative. With capacity dialed in, the next critical step is evaluating material longevity and long-term maintenance costs. Resin vs. Wood vs. Metal: The Real Cost of Maintenance Over 5 Years Picking a shed based on the price tag alone hides the true cost of ownership over five years. Wood looks beautiful, but it acts like a sponge. Due to material porosity—microscopic holes in the natural fibers—wood naturally absorbs ambient moisture. Without regular painting or sealing to block out high humidity, rot quickly sets in and destroys your investment. When weighing alternatives, let your local weather guide you. Metal is incredibly secure, but heavy moisture triggers oxidation (rust), making it a poor choice for rainy regions. Conversely, a plastic outdoor storage cabinet requires zero painting, needing only an occasional hose-down. However, you must buy high-quality plastics for dry, sunny climates; intense sun exposure causes UV degradation, where solar energy breaks down chemical bonds and turns cheap materials brittle over time. For a deeper dive into how UV rays affect outdoor plastics, This Old House offers an expert breakdown worth consulting before you buy. To settle the material debate for everything from heavy-duty structures to simple weatherproof deck boxes, consider this maintenance breakdown: Good (Metal): Lowest upfront cost, but highly rust-prone in wet climates. Better (Wood): Highly customizable and sturdy, but requires ongoing weekend painting projects. Best (Resin): Rust-proof, fade-resistant, and “set it and forget it” simple. After matching your maintenance tolerance to a material, the unit’s shape and function must align with your specific spatial constraints. From Deck Boxes to Tall Cabinets: Picking the Right Shape for Your Space If your patio feels like an obstacle course, the physical footprint of your storage matters as much as the material. For open decks, horizontal solutions easily handle bulky items like pool chemicals or patio cushions. Think of an outdoor storage chest as a heavy-duty trunk for your yard. When dealing with tight layouts where floor space is premium, multi-functional furniture becomes the ultimate problem-solver. Choosing a chest that doubles as a seating bench reclaims your entertainment area while keeping daily-use items instantly accessible. Narrow side-yards, however, require you to think upward rather than outward. Installing an outdoor vertical storage cabinet leverages empty air space to house awkward, long-handled tools like rakes and brooms. This upright outdoor storage functions like a traditional closet, maximizing capacity without eating up your walking path. According to the Family Handyman’s outdoor storage guide, vertical units are consistently rated among the most space-efficient options for small yards. Even the perfect silhouette requires proper ground preparation to ensure structural integrity over time. Why a Level Foundation Saves Your Doors from Sticking Assembling a new unit only to find the doors stuck is incredibly frustrating. This “shed racking”—a structural twisting—happens when your base isn’t perfectly flat. Prevent it before building with a simple three-step leveling check: clear all surface debris, tamp the bare soil firmly, and lay a long carpenter’s level across the footprint in multiple directions to ensure an even surface. Water remains the silent enemy of any yard upgrade. Proper shed foundation installation requires a dedicated drainage zone, which is easily created by laying down two inches of crushed gravel. Giving rainwater a fast escape route stops it from pooling beneath the floorboards, effectively answering how to prevent mold in outdoor storage while keeping your valuable lawn gear safe from rot. Beyond physical dimensions, the overall size of your unit dictates municipal regulations. As a general rule of thumb, exceeding 100 square feet usually triggers the need for local permits for backyard structures—the International Association of Certified Home Inspectors provides a useful permit reference to help you verify requirements in your area. With a solid foundation prepped and legalities cleared, you are ready to finalize your setup. From Clutter to Calm: Your 3-Step Action Plan to Outdoor Organization Transforming backyard chaos into organized calm allows you to finally reclaim your valuable garage space. Before purchasing a garden storage unit or outdoor storage cabinet, run through this final diagnostic: Inventory Audit: Verify your exact volume needs before clicking “buy.” Material Match: Confirm the materials will survive your local weather patterns. Placement Check: Finalize a level location ensuring proper drainage and daily accessibility. Proper outdoor storage isn’t just about hiding clutter; it is an investment in your